Lettuce Soup (Vegan or VGT)

TooManyVeggiesOh, it’s been a long time indeed. So long that you surely find yourself with a refrigerator full of greens and no humanly possible way to consume them before they plummet southward. That is why I have invented the Kitchen Cleanup Soup, aka Lettuce Soup, aka Random Greens Soup, and plenty of other things we could call it. Be honest, how many times have you found yourself with way too many seemingly unrelated greens on your hands and no good plan for how to  quickly and easily use them all together? Broccoli, asparagus, kale, kohlrabi, romaine – how can we unite them with one minimal, all encompassing effort? This soup is the perfect answer to that dilemma.


This is a lovely, light summer soup, a tasty and comforting autumn soup, a crisp and energizing spring soup, and basically an all-around all purpose soup that you can make in a huge batch and then freeze for a rainy day. It’s super easy, but it does take some time, though it is mostly passive time, letting the soup simmer away covered on the stovetop. Also, I hope you have a gigantic pot. Otherwise, queue the “we’re going to need a bigger boat” jokes.

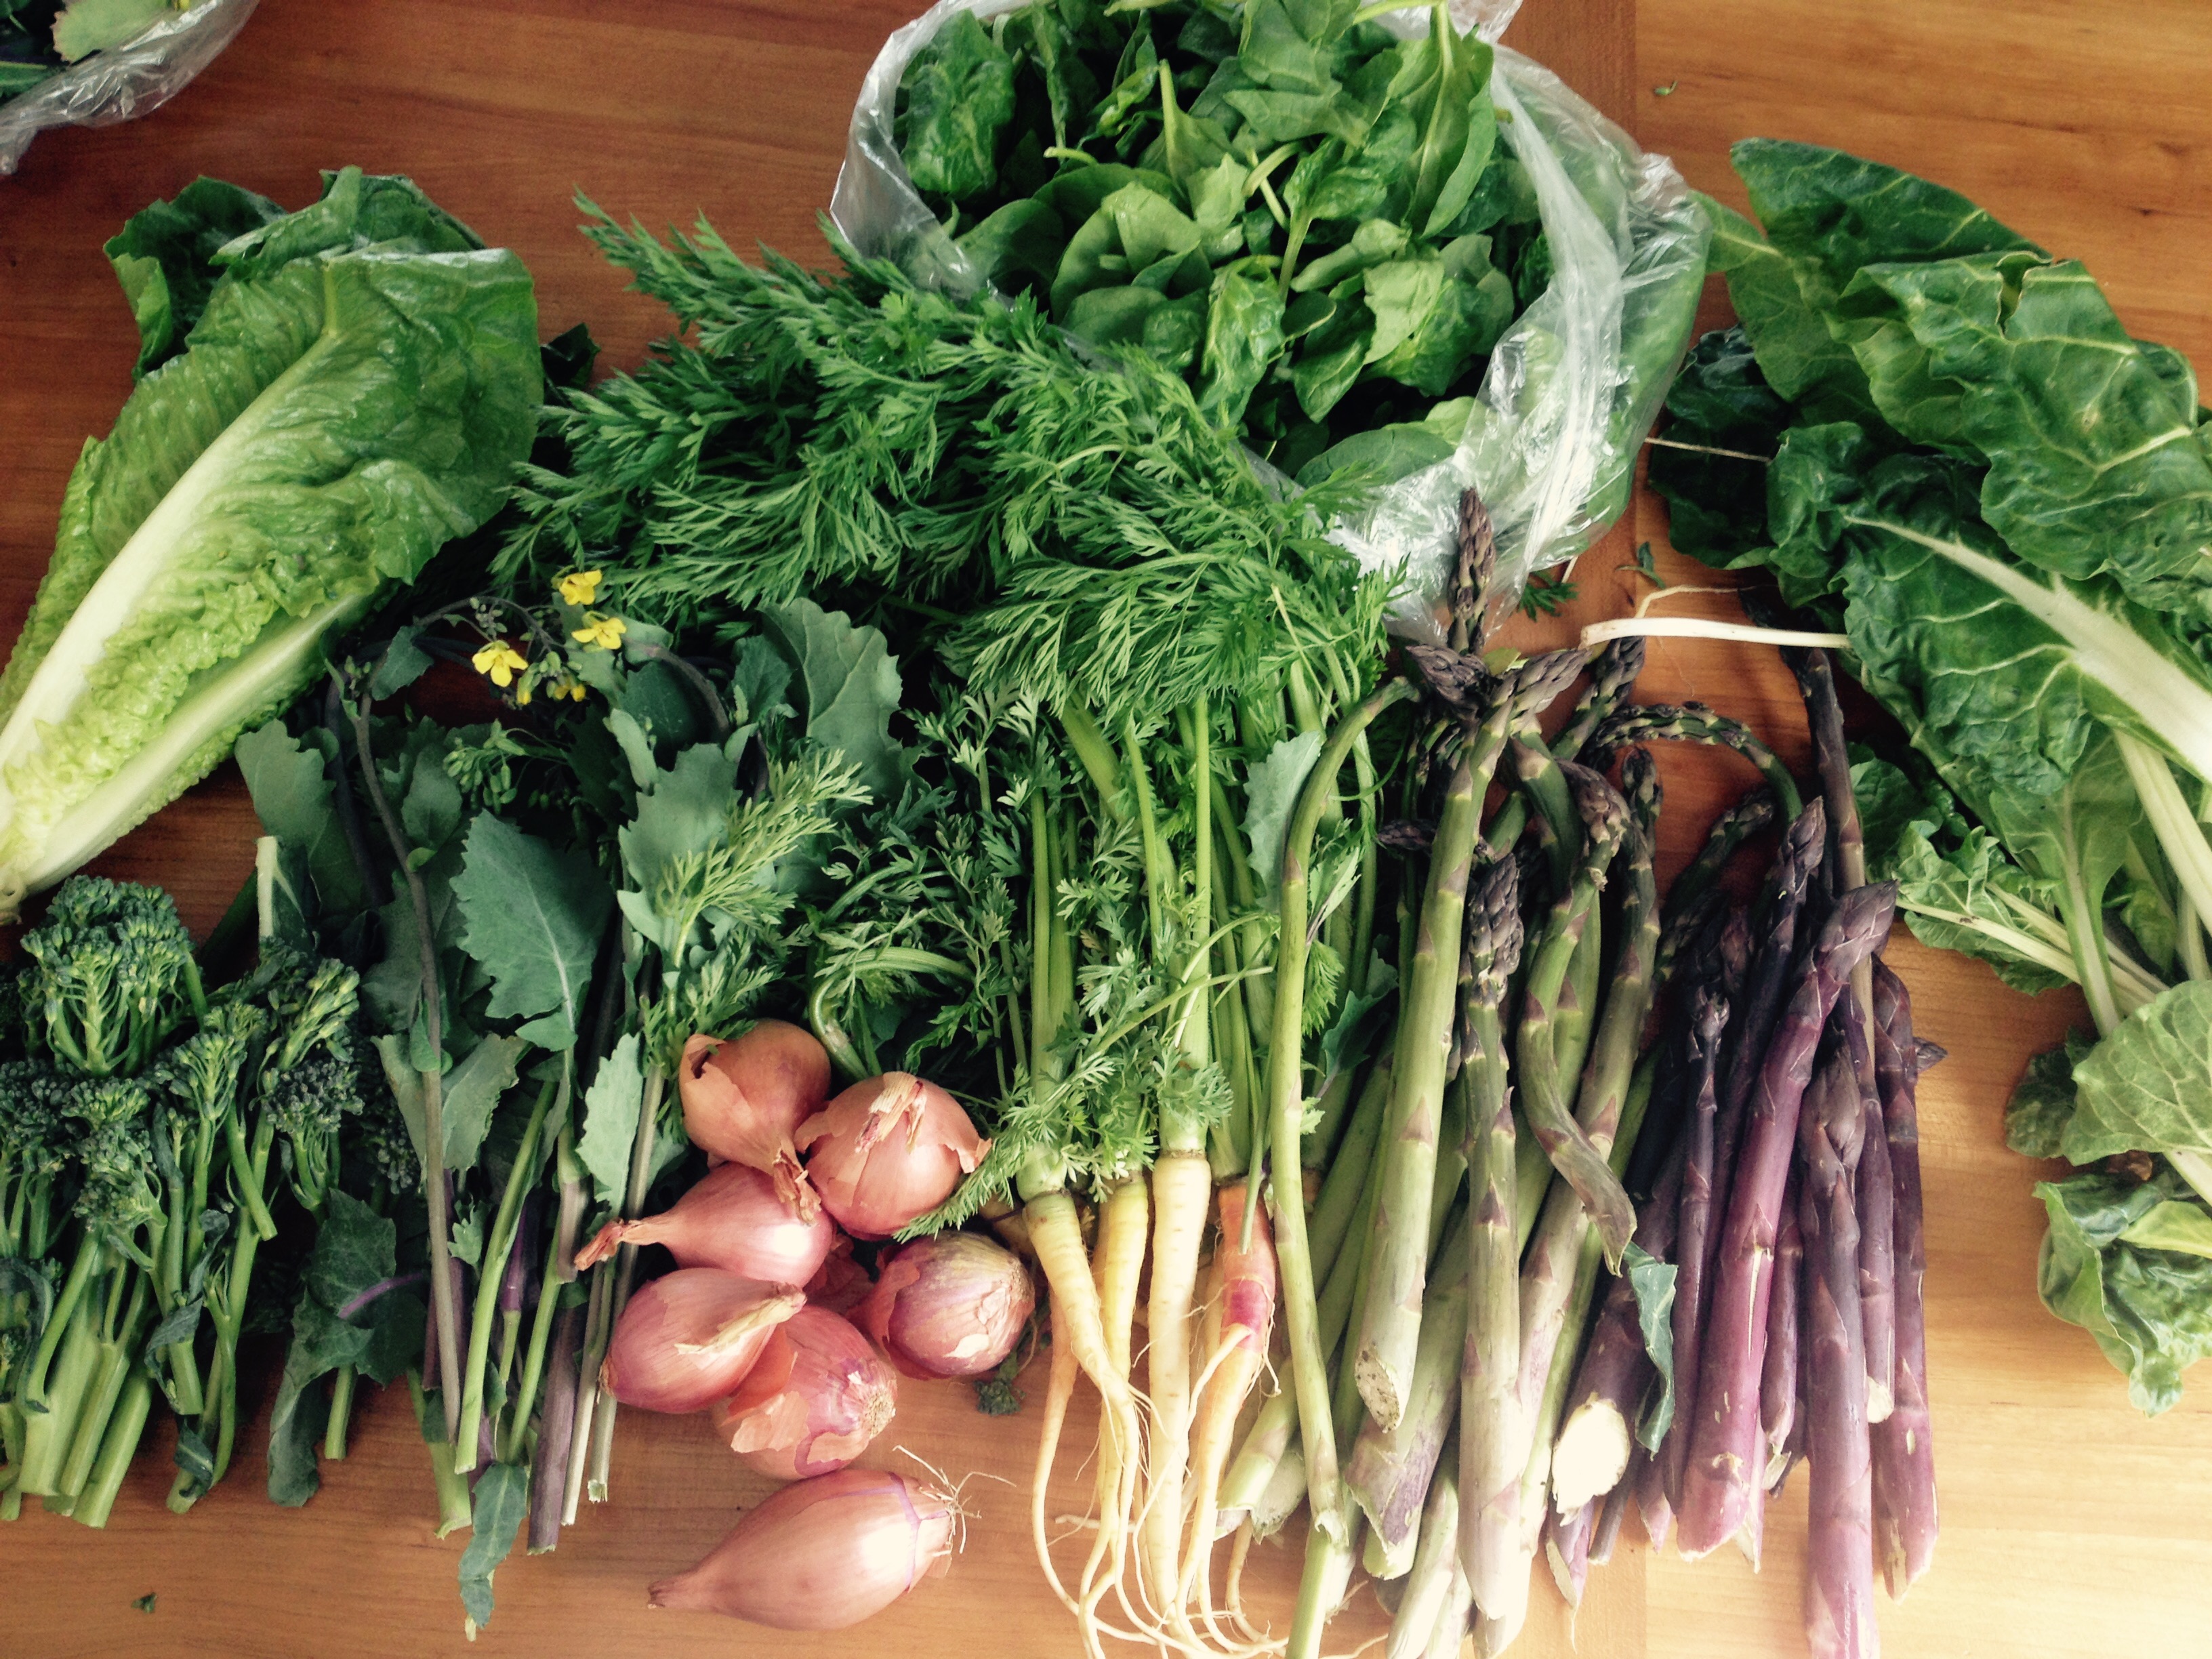
So many things can go in this soup, but here’s what I happened to toss together today.

Ingredients

  • 2 carrots, chopped
  • 2 celery stalks, chopped
  • 1 head broccoli, chopped
  • 1 head romaine lettuce, chopped
  • ½ lb assorted leafy greens, including kohlrabi, kale, chard, arugula (random stuff we picked at the u-pick farm without a specific plan – never a good idea, btw)
  • 1 large russet potato, chopped
  • 1lb asparagus, cut in 1inch pieces (tips reserved)
  • 4-6 cups soup stock (how much you need depends on your volume of veggies – should just cover the veggies in the pot but not so much that they’re drowned)
  • Cream to taste – either vegan sour cream or heavy cream of your choice
  • Salt to taste
  • Black pepper to taste
  • White pepper to taste
  • Reserved steamed asparagus tips (as garnish)
  • Parsley as garnish
  • 2 tbsp butter or olive oil for cooking

The easiest way to think of preparation is to break it down in three key steps:

    1. Creating the base. In a large dutch oven on medium heat, heat the oil or butter. Start by sauteeing the mirepoix (carrots, celery, onion, optional garlic if you swing that way). When everything is softened and it smells awesome, you’re ready to move to step two.
    2. Making the soup. Add the soup stock and all the other vegetables and seasonings, except for garnishing vegetables and cream (eg, asparagus tips, parsley, cream – those go in at step 3). Bring everything to a boil, then reduce to simmer, stirring often, for 20-40 minutes (basically until you’re firmest vegetables are tender – if you’re including potatoes, they will take the longest).
    3. Finishing touches. This is where you will adjust the seasonings and stir in the cream. When the soup is done, ladle into bowls with a dollop of cream, parsley, and a handful of steamed asparagus as garnish. I also like to serve it with a crusty baguette and/or a side of rice.

Enjoy!


Seared Grape Tomatoes with Balsamic (Vegan)

This is a bastardization of a delicious tomato sauce our friend Anthony makes. I once asked him how he made it and he said nonchalantly, “Oh, you know, sear the tomatoes and add some vinegar. Balsamic, sherry, red wine, whatever.” I, however, have never succeeded at achieving either his exact sauce or his nonchalance. But I think my version isn’t too bad. Makes a great topping for Savory French Toast, or pasta, or bruschetta, or just chomped plain. Also it’s really easy and takes just a few minutes.

Seared Grape Tomatoes with Balsamic

  • 4 oz grape tomatoes, halved (or cherry tomatoes – whatever)
  • Salt and pepper to taste
  • Balsamic to taste (about 2 – 3 tbsp, or a few light shakes of the bottle)
  • Chopped basil or parsley as garnish, if desired

Heat a medium skillet on medium-high. When it is hot, toss in the tomatoes, stirring constantly. Cook until they begin to darken and soften, about 3 – 5 minutes. Add a few splashes of balsamic and continue to stir a bit longer until the liquid is reduced. Stir in a dash of salt and pepper. Serve immediately and garnish if desired.

Phyllis’ Old-Fashioned Baked Beans (Vegan or Vegetarian)

“If there’s a secret to any of the few dishes I can create, it’s simplicity. And sugar, you can never go wrong with sugar.” – Phyllis (my mother)

Sage words, indeed. Phyllis said this in response to my fanatical raving about how awesome my baked beans turned out after I used her recipe for a 4th of July party and asked her where the heck she got it from. It is a dish that she has distilled to perfection over several decades of experimentation, based on a – yes, seriously – Betty Crocker original from a cookbook that she was given as a wedding gift in the 60s. Anyway, don’t let its humble origin fool you. These beans are fantastic and if you serve them at a party, they will disappear in short order.

A word about baked beans in general. They are a Midwestern potluck and bbq staple, and as such, we must make certain allowances for their unique strategy for tastiness. I am often a little hesitant and bashful to share the ingredients of some Sweet Home recipes of mine, because people are sometimes shocked at their … pragmatism, to put it delicately. In more candid terms, what I mean is that on the West coast I think people usually assume anything delicious comes from fresh, organic, farm-raised, sustainably produced, obscure and esoteric ingredients. Not always so back at Sweet Home. See, there’s this magic, versatile substance that is a mainstay of countless classics, which can be substituted for any number of more expensive, time-consuming and unpredictable ingredients … trust me, you’d be amazed. The mystery food in question. Is.

Catsup. There, I said it.

Now, before you judge me for using catsup instead of something more bohemian (not that you would, I’m just projecting), please consider for a moment the controversial cultural origin of America’s favorite condiment. For instance, it’s been theorized that modern catsup has origins as distant and arcane as 16th century Chinese tomato and fish sauces, or possibly similar time period Indonesian, Thai or Phillipino concoctions, or even possibly 17th century European adaptations of an Arabian pickling sauce, which evolved from the Arabic term “kabeees,” anglicized to “caveach,” the term for something you might know as “escabeche.” The thing is, food and language historians can’t agree. So instead of thinking of catsup as something commonplace and American, let’s appreciate it’s exotic and mysterious properties. And further, with these potential Asian/Indo/Euro origins in mind, I’d like to postulate a theory about the genealogy of old-fashioned “American” baked beans as we now know them, and suggest that perhaps they’re not too distantly related to the beloved Indian dish known as chana masala? Think about it – the white beans, the sweet and sour sauce, the hint of spiciness? Anyway, this is how I like to think about them. Don’t talk to me about English breakfasts or Boston beans. Chana masala is my story and I’m sticking to it. The end.

So without any further ado …

Phyllis’ Old-Fashioned Baked Beans

  • 1 large green bell pepper, diced
  • 1 large white onion, diced
  • 1 – 2 jalapeños, minced
  • 2 – 3 cloves garlic, minced
  • Dash of cayenne
  • 6 cans navy beans (cannelinis could work too)
  • Ketchup to taste (~2 tbsp
  • Brown sugar to taste (~1 cup)
  • Salt to taste
  • 5 tbsp olive oil or butter to be used in phases (if you choose butter that renders it unvegan, obvi)

Preheat oven to 300.

Heat a large skillet on medium. When the skillet is hot, add 2 tbsp olive oil or butter. When the oil or butter is hot, add the onions, pepper and garlic, and saute until softened. Salt to taste and stir in a dash of cayenne, to taste. Set aside to combine with the beans later.

To prepare the beans for baking, in the words of Phyllis:

“I use a rectangular cake pan but it doesn’t matter. Layer 1 to 2 inches of beans, sprinkle brown sugar generously over beans.* Continue layering until you reach the amount you want. At the top, instead of brown sugar, layer catsup . Doesn’t matter how much. I’m not crazy about catsup so I don’t use lot. Bake around 300 for about 45 min or until the catsup on top is thickened and beans are hot. Salt if preferred.”

*At this juncture I should point out a couple of departures I made from Phyllis’ method. For one, when I was layering the beans and brown sugar, I also dropped in small pats of butter for each layer. When I talked to her live she told me that sometimes she does it. You could also drizzle a tiny amount of oil or vegan butter instead. This is not mandatory but does add a creamy, rich flavor.

Also, the vegetables are my own embellishment. They are not standard but intended to make up for the fact that she usually makes them with ham or bacon or both, so I wanted to add flavor to compensate for the absence of pork.

Anyhoo, after you follow Phyllis’ method of preparing the beans, when they are five minutes from fully baked, pull them out of the oven and stir in the sauteed vegetable mixture. If you like, drizzle a bit more catsup on top and then bake for another 5 minutes or so. Serve hot.

Awesome Russian Borscht (Vegan or Vegetarian)

Mmm, sveklaI know what you’re thinking: “Borscht? Isn’t that made with beets? BLARGH!” If so, it’s probably just because you’ve never had beets prepared well. The atrocities that are commonly committed against beets have conspired to make multiple generations of Americans despise them, and understandably so. Oh believe me, I was one of the haters. My loathing of beets was so deep and profound that when I was given the opportunity to travel to Russia as a teenager in the 90s, my fear of having to eat beets was one of my top concerns, surpassing all of the following: fear of being in a country without speaking the language, fear of flying for 20 hours, fear of being separated from my family for the longest period of time so far, fear of visiting our notorious Cold War enemy, and fear of living with another family that I’d never met. Mind you, while I was there I learned how stupid that was, not just because beets are actually awesome if you know what to do with them, but because obviously there were plenty more valid things to be terrified about in post-Soviet Russia than my naive adolescent mind could ever have fathomed prior to my travels there. Of course there were also equally as many things to be moved and amazed by as well. Which brings me to …

A brief back story for the interested (all others, feel free to skip to the recipe)

So, back in 1993 I was part of a group of teenage students who participated in an exchange program to Russia about one year after the dissolution of the Soviet Union.We stayed in a town called Izhevsk, and at the time that we visited, Izhevsk had been closed to foreign travel for 70 years due to its strategic importance to the USSR (there was a huge munitions plant located there). Hence, when we arrived, we were the first non-Russians that most of Izhevsk’s people had ever seen. Which may seem like a trivial detail, but let me explain what that translated to: Our presence there was such a marvel that our agenda was published in newspapers and on TV every day. What that resulted in was that everywhere we 15 adolescent Americans went, we were met with an ever-growing crowd of passionate Russian youths who saw us as harbingers of progress. I could go on and on here about the people I met, the gifts I was given, the lessons I learned, the heartbreak I experienced (these new friends of ours had some tough political times ahead of them, the likes of which few US citizens I know have ever had to face –  plus we were all fairly new to the concept of suffering and injustice and economic hardship. Not to mention, most of these new friends we would never see again). But I shan’t go on about that. If you want to know more, email me and I’ll share. What I will say is that the group I was part of was a brave, sensitive, intelligent and talented group, and yet, as we prepared for our travels, we had NO idea what was in store for us. And that being the case, with all of us being teenagers, and  with all of us hating beets, we took it upon ourselves to learn one essential Russian phrase, so universal to us it instantaneously reached permanent inside joke status: Nyet svekla. Translation: “No beets.” The one who conceived and coined the phrase will forever hold a place in my heart for her comic wit, resourcefulness and candor.

That said (and I think she’d agree), looking back on the scenario and knowing what I know now, I can’t imagine ever saying something like this to someone from Russia. But from the perspective of my teenage self, the concept seemed sheer genius and hilarity. When we did utter it to Russians, we were met with a quizzical furrow of the brow that was probably akin to how Americans would respond if a generally non-English speaking Russian teen were to enthusiastically proclaim “Decline potato!” – a reaction which would be a mixture of equal parts “Um, what?” and “Really? Why?”

In any case, “nyet svekla” being our eminently confident attitude, you can imagine our astonishment when we were unwittingly fed a mysterious, unbelievably delicious pink soup and then later learned it was the dreaded borsht, aka beet soup, we’d feared so much. How could this be?!?! For starters, we’d made it very clear – we wanted NO SVEKLA. But more than that, how could svekla be so damn tasty? Mmmmm. What else is in it? Can I get the recipe? And the people I’d baffled with my broken Russian, unnatural aversion to beets and weird American clothes were filled with glee.

Although the following is not the original Russian recipe, it is the closest one I’ve found to the soup I was first fed that made me such a pro-svekla devotee. So please give it a chance – I think you’ll be glad you did.

Russian Borscht

  • 1 c. potato, thinly sliced
  • 1 c. beets, thinly sliced
  • 4 – 6 c. water (to your desired soupiness/thickness)
  • 1 – 2 tbsp olive oil or butter
  • 2 c. onion
  • 1 tsp caraway seeds
  • 1 stalk celery, chopped
  • 1 carrot, sliced
  • 3 c. shredded cabbage (a little less than half a head)
  • 1 tsp fresh dill (plus extra for garnish)
  • 1 – 2 tbsp cider vinegar
  • 1- 2 tbs honey
  • 1 c. tomato paste
  • Salt and pepper to taste
  • Sour cream and dill for garnish

In a large sauce pan, place potatoes, beets and water and cook over medium heat until tender (~20 – 30 minutes).

Meanwhile, melt the oil/butter in a Dutch oven on medium heat. Add onion, caraway seeds and salt. Cook, stirring regularly, until onions are translucent (~8 – 10 minutes).

Add celery, carrots and cabbage, plus ~2 cups of the cooking water from the potatoes and beets. Cover and cook over medium heat until the vegetables are tender (~10 minutes).

Add the remaining ingredients (including all the potato and beet water), cover and simmer for 15 – 30 minutes more. Taste to correct seasonings. Serve hot with a dollop of sour cream and dill to taste.

Spicy Baked Eggs (Vegetarian)

First of all, I invite you to follow me on Twitter @zdoerck for my 140 character version of this recipe and more to come. For those of you who are seeing this on Facebook, apologies for the redundancy.

This is an adaptation of a Pakistani recipe from The Spice Spoon (bonus: contains charming nostalgic reflection upon author’s childhood experience). My modifications include doubling the onion, adding garlic, cayenne and red chili flakes, and cooking stovetop instead of baking. You certainly can bake it if you prefer, but I find the eggs cook more uniformly on the stove, and it is also easier to avoid over-cooking them. You could also use any form of chili you like – a bit of minced jalapeño or serrano would be lovely in place of the dry chili seasonings.

Spicy Baked Eggs

  • 4 cage-free organic eggs
  • 2 tbsp olive or grapeseed oil
  • 4 medium tomatoes, blanched, peeled and diced
  • ½ onion
  • Pinch turmeric
  • Pinch cayenne
  • 1 – 2 cloves garlic
  • Red chili flakes to taste
  • Salt and pepper to taste
  • Chopped cilantro for garnish

Blanch tomatoes for one or two minutes. When skins begin to break, plunge into cold water to stop the cooking. Peel off the skins and dice the tomatoes.

Heat oil on medium heat in medium sized skillet. When the oil is hot, add the onion and sauté until translucent. Stir in the tomato and spices and cook, stirring frequently, for about 5 – 7 minutes.

Place the raw eggs on top of the tomato mixture. To ensure no broken yolks or eggshell, I would recommend cracking each egg into a small bowl and carefully placing them on the mixture one at a time. Incidentally, did you know that some chefs recommend cracking your egg on a hard, flat surface rather than an edge, to ensure more even cracking? I’ve tried it and it does seem to yield better results …

Once the eggs are in place, cover and leave them to cook. Check back in about 12 to 15 minutes – if you prefer runny yolks, 15 to 17 minutes is probably all you need; for more solid yolks, you may need about 20 minutes.

Garnish with cilantro and serve immediately with naan or pita.

Homemade Coconut Peanut Butter (Vegan)

You know what’s easier to make than peanut butter? NOTHING.

Basically, take a cup of peanuts (salted or unsalted, roasted or not), drop them in the food processor and blend until smooth, which takes about a minute or two. If you have used unsalted peanuts, add a little sea salt to taste.

However, if you, like me, are never content to settle for just one ingredient, there are many tasty things you can add. For my first batch I specifically wanted to use coconut oil, because that seemed like it would be crazy delicious.

I made this version for J for his birthday (words could never express how much that man loves peanut butter). It’s on the sweet side – best probably as an ice cream topping or dessert snack. It would also make an awesome peanut butter and banana sandwich.

Homemade Coconut Peanut Butter

  • 1 cup salted peanuts
  • 2 tbsp coconut oil
  • 1 tbsp honey

Combine and blend. And that’s the end.

Pickled Chanterelles (Vegan)

Infographic: What are we pickling at 4 am? Mm-hm.

In my defense. Many of you are already well familiar with my chronic 4 am insomnia, which can nearly always be traced to a violent allergy attack, though sometimes I just wake up at 4 am for no particular reason, I guess out of sheer habit. According to my mother, this has been happening since before I could read. At this point in my life I am far beyond being angry or annoyed about it; I’d describe my attitude about it these days as existentially fatigued resignation. Mind you, this hasn’t always been the case. When I was young and restless and didn’t know any better, I used to get out of bed and write feverishly in my journal all night, or sneak out of the house to do god-knows-what (honestly, I don’t remember, but I’m sure it was nerdy and emo). Later in life, frustrated at the injustice of my plight, I would simply toss and turn, in vain hopes of returning to sleep (which wouldn’t ever happen until around 6:30 am, about a half hour before it was time for me to get up). In recent years, due to the advent of smart phones, I have become more zen and used those quiet solitary hours between 4 and 7 to read random things on the internet, which has helped me stay current on important topics like the feeding habits of deep-sea frilled sharks and the etymology of the ampersand.

In a strange new twist, however, the last several times I’ve woken up at 4 am, I have been overcome with the desire to cook something. Through the first few episodes I managed to resist the impulse, yielding to the voice in my head that said “Really? You know how nutty that sounds, right?” Ultimately, however, my urge to do something with the fresh chanterelles aging in my refrigerator won out. Hence, these pickled delights.

This recipe isn’t my invention; I gaffled it from Chez Pim, who adapted it from someone else. In any case, I stand by it as a great way to preserve your chanterelles or any mushrooms you might have on hand. Whip them up, chill overnight, and then serve them as a tapa, use them as a condiment with your favorite neutral entree, pile them on top of a sandwich, toss them into a salad, or just nom them alone.

Pickled Chanterelles (Vegan)

  • 1 lbs mushroom
  • 2 large shallots, sliced into thin rounds
  • 3 large garlic cloves, peeled and sliced into rounds
  • 1/2 tbsp whole coriandar seeds, lightly toasted
  • 1/2 tbsp black pepper, coarsely ground
  • 1/4 c. golden raisins
  • 1/2 c. cider vinegar
  • 1/2 c. of olive oil
  • 1/2 tsp  sea salt

Clean the chanterelles by brushing them or wiping them with a damp cloth. If they are super dirty, go ahead and just rinse them in cold water.  Pat them dry and cut them into medium pieces.

Bring a large pot of water to a boil, add the mushrooms to the pot and let boil for 1 minute, then remove from heat.  With a slotted spoon, scoop them into a colander, being careful to leave any dirt that boiled off in the pan.  Run cold water over the mushrooms to stop them cooking, and leave them to drain.

Heat another pot on medium and add a bit of the olive oil. When the oil is hot,  add the garlic and shallots and cook, stirring constantly, over medium to low heat until the shallots are translucent.  Add the pepper, coriandar, raisins, vinegar, olive oil, and salt.  Stir to blend and bring to a simmer.

Add the blanched mushrooms, stir to blend and remove from heat.  Transfer the mushroom into a glass or ceramic container.  Cover and let them rest in the fridge for 24 hours before using.

Blueberry Cucumber Smoothie (Vegan)

Speaking of cucumber weirdness, I’ve been loving this unlikely marriage of everyday cukes with our magnanimous friend the blueberry almost enough to ease my sorrow over giving up bagels.

Got the idea for this one from Vegetarian Times, but I have made a handful of changes to a) make it vegan; b) add protein; and c) enhance the flavor immeasurably, IMHO. (Side bar – can an opinion ever be humble? Seems like a rather unctuous turn of phrase to me … please accept my apologies.)

Anyway, for a detailed account of changes I made (which you are free to unmake), see the Notes section below.

Blue Cue Smoothie

  • 1 c. fresh blueberries
  • 1 large cucumber, peeled and seeded (I just scoop out the seeds with a spoon)
  • 1/2 c. unflavored non-dairy yogurt (I use Soyogurt)
  • 1/8 c. sliced raw almonds (unsalted)
  • 1 tbsp honey
  • 2 tsp lime juice
  • 1/8 c. (or more, to taste) non-dairy frozen yogurt, vanilla-flavored

Chop the cucumber and toss it in a food processor or blender with the other ingredients. Pulse several times until you reach desired consistency, and voila – a quick and healthy breakfast or snack containing vitamin C, protein, fiber and hella antioxidants, under 300 calories all told. The quantity here is enough for two servings – they’re pretty filling.

Notes

The Veg Times version calls for twice as much cucumber, twice as much yogurt (the latter being dairy and vanilla-flavored), lemon instead of lime, and no almonds or frozen yogurt. The almonds are critical for me – they add a smooth richness that makes it much more filling as well. And the fro-yo adds a bit of sweetness and structure. As for the lime, it was just because I had lime and not lemon, but I’m sure either is fine, though lime may be milder.

Play with the ratios all you want – personally I prefer to go heavy on the blueberries. And of course, feel free to use dairy versions of either the yogurt or frozen yogurt. You could make it with only frozen yogurt, but be careful with that because it could end up uber-sweet, and a strong vanilla flavor will mask the cucumber. (Learned this the hard way.)

 Blueberry pic from Interbay Farmer's Market

Mushroom Croustades or Stuffed Mushrooms, Your Pick (Vegan or Vegetarian)

The choice between making these as croustades or as stuffed mushroom caps depends on whether you want them to be vegan (croustade shells are not vegan) and/or whether you happen to have any croustade shells handy. In my case, I did just so happen to have some handy as the result of discovering these puppies at Ikea (weird, eh?) and stockpiling about 5 dozen of them like the freakshow that I am. Also I did not have enough mushrooms to do caps. Hence, the croustades you see pictured at right.

Note that you also have a further choice in whether or not to use vegan cream cheese or make a non-vegan goat cheese version. Obviously the goat cheese version is much richer and tangier, but they are both super tasty and perfect as a party appetizer.

Lastly, I garnished these with sauteed porcini mushrooms, but you can garnish them with any kind of mushroom, or chives, or parsley, or whatever floats your boat. If you have access to porcini, I’d say spring for them – they are a bit pricey but you only need about 1/10th of a pound (2 or 3 small ones). Note: Take care when selecting porcini – avoid any with soggy, yellow or greenish parts, and inspect them for holes or little trails – unfortunately, they can be wormy.

Stuffed Mushrooms or Mushroom Croustades

  • 2 tbsp olive oil
  • 1/2 lb baby bella mushrooms OR 1 lb if you’re making stuffed mushrooms (Note that each version requires different mushroom preparation – see below)
  • 1/4 c. chopped parsley
  • 2 – 3 large garlic cloves, minced
  • 1 shallot, chopped
  • Cheese – either:
    • 8 oz vegan cream cheese, OR
    • 4 oz goat cheese and 4 oz regular cream cheese
  • 1/4 tsp cayenne
  • Sea salt and ground pepper, to taste
  • 1 – 2 tbsp minced chives, for garnish (optional)

Preheat your oven to 350 degrees and set out the cheese to soften. Clean the mushrooms with a damp cloth or mushroom brush.

If you’re making the croustades, slice the mushrooms in about 1/4 inch thick slices, reserving 2 orf 3 big ones for garnish (or you could use the stems), if desired. If you’re making stuffed mushroom caps, break the stems from the caps and chop the stems coarsely, taking care to slice off and discard any tough ends. Set the caps aside.

Heat a large skillet on medium. When the skillet is hot, add the oil. When the oil is hot, add the shallot and garlic and saute for a minute or so, stirring constantly. Add the mushroom slices and cook for about 2 minutes, stirring regularly. After a couple minutes, cover, stirring occasionally, until the mushrooms have juiced (3 – 5 minutes or so). When they’ve juiced, remove cover and continue to cook, stirring regularly until the juice is reabsorbed (1 – 2 minutes).

Transfer to a food processor or blender and pulse the mushrooms a  couple times until they’re a quasi-duxelles. (Yeah, okay, I just really wanted to use that word. Color me ostentatious.) Add the cheese and cayenne and pulse a few more times until well blended. Stir in the parsley and season with salt and pepper to taste.

Spoon mixture into croustade shells or mushroom caps (it will probably fill around 2 dozen or so; if you have filling left over, serve it as a dip or use it as a spread). Place them on a baking sheet and bake them in the oven, 5 to 8 minutes for the croustades. For the caps, oil the baking sheets before adding the caps. Bake them for about 12 – 15 minutes or so (basically until the caps are tender), but keep an eye on the filling so it doesn’t burn.

While that’s baking, if you want to make a mushroom garnish, coarsely chop the remaining mushrooms or mushroom bits and saute quickly in olive oil with a bit of garlic, following the directions above. Salt to taste and spoon onto the tops of the baked croustades, and/or sprinkle with chives.

Serve immediately.

Little Green Hot Peppers from Padrón (Vegan)

As the malaprop goes, “Ones are spicy, anothers don’t.” Indeed.

Ones are spicy, anothers don’t.

The little green hot peppers in question are known as “Pimientos de Padrón” and originally hail from the state of Galicia in Northern Spain. I first learned about said peppers while living in Santiago de Compostela several years ago. I can’t speak for the rest of Spain, but I do know you can’t spend much time in Santiago before you notice that every 10th tourist is sporting a t-shirt proclaiming the celebrity of the tasty peppers in a delightfully awkward translation from the Castilian Spanish, “LITTLE GREEN HOT PEPPERS FROM PADRÓN, ONES ARE SPICY, ANOTHERS DON’T” (pictured at right).

In Castilian Spanish, the proverb actually goes “Algunos te pican, otros no,” for which the direct translation is “Some sting you, others do not.” Which clearly doesn’t translate well to English either. Essentially, this particular saying just highlights the disparity between how Spanish and English treat indefinite pronouns, not to mention how we express spiciness – as a state versus as an action. Personally, I like to think of spiciness as an action, and I think the mistranslation captures the truth of the matter more concisely and appropriately in its inobeisance of grammar constructs. My kitchen is free from the tyranny of language rules.

Anyway. These little green hot peppers are so ubiquitous in Galicia that it’s hard to even have one drink at a bar without someone serving you a few as a free tapa. I do not exaggerate. They’re so everywhere all the time that people are giving them away for free. Which is how I quickly came to learn to prepare them myself. And the truth is, they are super easy to make as a quick appetizer or snack at home. The hardest part (in San Diego, anyway) is getting your hands on some of them. They sometimes have them at Whole Foods or other grocery stores. We usually get them from  Suzie’s Farm at our nearby Farmer’s Market. You could also join their CSA and presumably have access to peppers of Padrón whenever they’re in season, as well as plenty of other awesome vegetables.

Pimientos de Padrón

  • 1/2 lb peppers of Padrón
  • 4 tbsp olive oil
  • Lots of salt

I was taught this method of preparing peppers of Padrón by a lifelong resident of Galicia. He basically said to me, “Heat a lot of oil in a pan. When it is hot, throw in the peppers. The oil will splatter. Ignore it. Well, don’t burn yourself on it, just don’t be stupid. Afterwards, stir in an amount of salt which is far more than you think you should, and after you’ve done that, add even more. You will probably never put enough salt in, because you will think nothing should have that much salt. But you will be wrong.”

It’s true. Every time I’ve made these, I’ve thought I put an insane amount of salt in, and afterwards I’ve thought, “Gosh, that really could have used more salt.” Though they’re still delicious anyway.

So, fry them in salt, stirring frequently, until the peppers are blistered and browned. Serve hot, but not too hot (don’t want to bite into boiling oil, you know).

And by the way, beware. Some of them are spicy and others aren’t.