Mushroom Croustades or Stuffed Mushrooms, Your Pick (Vegan or Vegetarian)

The choice between making these as croustades or as stuffed mushroom caps depends on whether you want them to be vegan (croustade shells are not vegan) and/or whether you happen to have any croustade shells handy. In my case, I did just so happen to have some handy as the result of discovering these puppies at Ikea (weird, eh?) and stockpiling about 5 dozen of them like the freakshow that I am. Also I did not have enough mushrooms to do caps. Hence, the croustades you see pictured at right.

Note that you also have a further choice in whether or not to use vegan cream cheese or make a non-vegan goat cheese version. Obviously the goat cheese version is much richer and tangier, but they are both super tasty and perfect as a party appetizer.

Lastly, I garnished these with sauteed porcini mushrooms, but you can garnish them with any kind of mushroom, or chives, or parsley, or whatever floats your boat. If you have access to porcini, I’d say spring for them – they are a bit pricey but you only need about 1/10th of a pound (2 or 3 small ones). Note: Take care when selecting porcini – avoid any with soggy, yellow or greenish parts, and inspect them for holes or little trails – unfortunately, they can be wormy.

Stuffed Mushrooms or Mushroom Croustades

  • 2 tbsp olive oil
  • 1/2 lb baby bella mushrooms OR 1 lb if you’re making stuffed mushrooms (Note that each version requires different mushroom preparation – see below)
  • 1/4 c. chopped parsley
  • 2 – 3 large garlic cloves, minced
  • 1 shallot, chopped
  • Cheese – either:
    • 8 oz vegan cream cheese, OR
    • 4 oz goat cheese and 4 oz regular cream cheese
  • 1/4 tsp cayenne
  • Sea salt and ground pepper, to taste
  • 1 – 2 tbsp minced chives, for garnish (optional)

Preheat your oven to 350 degrees and set out the cheese to soften. Clean the mushrooms with a damp cloth or mushroom brush.

If you’re making the croustades, slice the mushrooms in about 1/4 inch thick slices, reserving 2 orf 3 big ones for garnish (or you could use the stems), if desired. If you’re making stuffed mushroom caps, break the stems from the caps and chop the stems coarsely, taking care to slice off and discard any tough ends. Set the caps aside.

Heat a large skillet on medium. When the skillet is hot, add the oil. When the oil is hot, add the shallot and garlic and saute for a minute or so, stirring constantly. Add the mushroom slices and cook for about 2 minutes, stirring regularly. After a couple minutes, cover, stirring occasionally, until the mushrooms have juiced (3 – 5 minutes or so). When they’ve juiced, remove cover and continue to cook, stirring regularly until the juice is reabsorbed (1 – 2 minutes).

Transfer to a food processor or blender and pulse the mushrooms a  couple times until they’re a quasi-duxelles. (Yeah, okay, I just really wanted to use that word. Color me ostentatious.) Add the cheese and cayenne and pulse a few more times until well blended. Stir in the parsley and season with salt and pepper to taste.

Spoon mixture into croustade shells or mushroom caps (it will probably fill around 2 dozen or so; if you have filling left over, serve it as a dip or use it as a spread). Place them on a baking sheet and bake them in the oven, 5 to 8 minutes for the croustades. For the caps, oil the baking sheets before adding the caps. Bake them for about 12 – 15 minutes or so (basically until the caps are tender), but keep an eye on the filling so it doesn’t burn.

While that’s baking, if you want to make a mushroom garnish, coarsely chop the remaining mushrooms or mushroom bits and saute quickly in olive oil with a bit of garlic, following the directions above. Salt to taste and spoon onto the tops of the baked croustades, and/or sprinkle with chives.

Serve immediately.
Not Remotely Vegan Mushroom Leek Omelet (Vegetarian)

Let’s face it. There are times in life when you have no choice but to eat a delicious omelet. Unless you’re strictly vegan, in which case there may be times when you have no desire to eat a delicious omelet but would certainly still enjoy a nice tofu scramble. If that’s the case, I promise you I will post a vegan alternative to the aforementioned omelet one of these days. Promise. Pro. Mise.

In the meantime, however, all I have is this totally non-vegan omelet, with nothing to say for myself except that I love this omelet.

Actually, I do have one more thing to say for myself, which is that we went on a lovely trip to the Russian River for the 4th of July holiday this past weekend, and stayed with our friends Ben and Harley and Harley’s awesome parents at their river house. And the house was full of animal products all weekend. And everyone had brought more eggs than anyone knew what to do with. And we had a house full of hungry friends each morning. And we had me, always wanting to cook something that will make everybody happy. And me, always one to throw rules to the wind for festive reasons. And me, additionally harboring twice as many mushrooms as I knew what to do with. And so I invented this omelet. I was forced to really, I had no choice. I couldn’t let all those eggs and mushrooms and potential omelets go to waste, could I?

But why am I being an omelet apologist? You don’t have time for that. You have a fantastic omelet to devour, and now I’m just standing in your way. So onward. The omelet. Let the fruits of our Independence Day revelry live on.

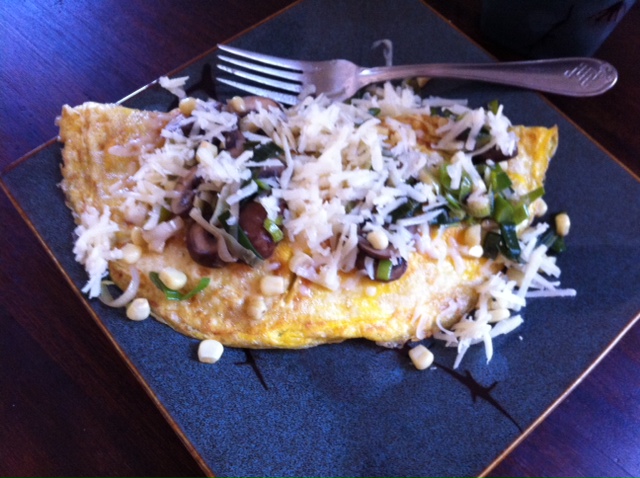
Mushroom Leek Omelet

The filling

  • 1 leek, thoroughly cleaned, sliced
  • 8 oz baby bella (cremini) or chanterelle mushrooms, sliced in 1/4 inch slices
  • 2 tbsp olive oil (Note: If you’re not opposed, replacing the oil with butter makes it extra delicious. I know, I’m miserable at being vegan.)
  • 1 c. fresh corn from the cob (canned or frozen also works)
  • Salt to taste
  • 1/4 c. shredded gruyére (optional)
The omelet
  • 4 cage-free organic eggs
  • A bit of water or (if you must) milk
  • 2 tbsp olive oil

For the filling. Heat a medium sized pan on medium to medium high. When hot, add oil. Once the oil is hot, add the leeks, stirring to cover thoroughly with oil. (If you’re using butter, let the butter melt completely before adding leek.) Saute a while, stirring often, until leek begins to soften, about 2 or 3 minutes. Add mushrooms and stir to coat with oil. Continue to cook for another minute, stirring regularly. Cover, and leave the mixture a while for the mushrooms to juice, about 2 or 3 minutes more, stirring occasionally. When the mushrooms have juiced, remove cover. Add corn and cook another 2 or 3 minutes, being mindful that the leeks and mushrooms don’t overcook. Add salt to taste. Remove from heat to a bowl.

For the omelet. Crack the eggs into a medium sized mixing bowl, being careful to remove any bits of shell that may get involved. Add a bit of water (or milk, if that’s what you’re using); approximately 1/8 to 1/4 cup. Whisk briskly until mixture is fairly uniform, being careful not to over whisk. (Whisking eggs too long introduces bubbles and can make them intolerably fluffy. Just my humble opinion.)

Heat a large skillet on medium high, add oil. When oil is hot, pour in one half of the egg mixture slowly (my brilliant friend Ben ladles it in with a 1/4 c. measuring cup, letting the egg solidify as he adds the mixture). This part of the omelet takes omelet talent. Let the egg cook through on bottom, occasionally tipping the pan to let any liquid reach the edge of the pan.

When the egg mixture seems mostly cooked through, spoon about half of the mushroom filling in the middle of the omelet. (Note: Eyeball it to make sure the amount of filling makes sense. Too much filling is a common source of fallen omelets.)

Allow the omelet to cook just a bit longer, and if you’re using the cheese, now would be the time to sprinkle it in. Flip one side of the omelet over to cover the other. If you are omelet-inept, using a combination of a spatula and spoon may be advisable. Beyond that, all I can tell you is that omelets take practice and finesse. But if your omelet falls, don’t despair. It tastes the same, no matter what shape it’s in.

When you have folded over the omelet, cook on each side until slightly browned.

Voila. So there’s my favorite omelet.

Morels Reloaded: This Time It’s Personal (Vegan)

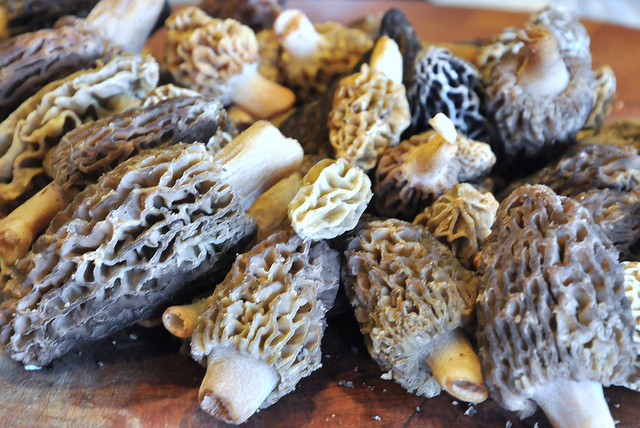
Damnit morels, you shall bend to my will! This was my thought when I rounded the corner at the grocery store the other day and spied my old nemeses lying nonchalantly among the shitakes and bellas. In spite of my terrible first experience with morels, or maybe because of it, I was suddenly possessed with an overwhelming desire to conquer them for once and for all. Or at least prove to myself that they suck no matter what I do to them. So I picked out a very small number of the good’uns (after all, I was only cooking for myself, plus this was an experiment, plus they’re super freaking expensive) and made up my mind that in spite of the advice of all the morel connoisseurs, I was going to soak the hell out of these puppies and then torture them to death in the frying pan, because the intolerable grittiness and chewy consistency are what did me in so thoroughly the  last time. Although morel lovers might tell you it’s unnecessary to soak them or that it will compromise their flavor, I’m here to tell you this: The morels I made after soaking them for several hours in salt water vs. the morels I made last month following the advice of the experts to “preserve the flavor” were like night and day. The morel* of the story is, don’t underestimate how much gritty, tripe-like mushrooms can ruin a dish.

This batch, however, made me understand why people are so cuckoo for morels. They are just super rich, meaty, earthy, forest-y, and … je ne sais quoi. I did so very little to them aside from the soaking and the stovetop abuse, yet nevertheless they were delish. So, yeah, I stand corrected, they don’t suck. Though I do still think they’re super creepy-looking. Regardless. You should try them. And in case you were concerned, a word about them being expensive: Yes, you might find them as high as $40/lb. But they are super light and you don’t need very much. 1/4 lb is often all you need for 2 – 3 servings. Which isn’t cheap, but it’s doable.

Here’s whatcha do:

Find a place that sells morels. The only places I’ve ever seen them here are Whole Foods and the farmer’s market. Pick morels that are spongy and light to medium brown, not super dry and not super moist. If you rub your finger the length of them, they shouldn’t crumble – that’s a sign they’re old. Once purchased, take them home and if you must store them, put them in a paper bag or a basket covered with a moist paper towel and refrigerate. Don’t keep them too long – their shelf life isn’t more than a week and you don’t know how long it took them to get to you in the first place. I’d say eat them within 3 days or less of buying them.

When you’re ready to prepare them, shake them up in their container to dislodge any loose debris. Rinse them thoroughly. Cut them in half (lengthwise). Fill a bowl with cold water and place them in it to soak. The folds of the mushroom are what you want to cleanse, so be sure they are brainy side down in the water.

I soaked mine for about 6 hours, replacing the water 5 times, stirring salt into the water for 2 of the 5 soaks and agitating them in the water at least once per soak. When I was finally ready to prepare them, I agitated them for a minute or two, then rinsed them thoroughly in running water before moving them to a towel and patting them dry.

Perhaps this is where I should mention that I’m obsessed with mushrooms and don’t mind putting this much work into them at all. Some of you may think this is ridiculous, and who am I to say you’re wrong. But I love mushrooms. So back to the recipe.

Simple Morels

  • 1/4 lb morels, thoroughly soaked (see above), halved, stems removed
  • 2 tbsp chopped parsley
  • 1 small leek, thoroughly cleaned and sliced
  • 1 clove garlic, minced
  • 1 – 2 tbsp olive oil
  • Sea salt to taste

Heat a small nonstick pan over medium heat. Add the oil. When the oil is hot, add the morels and a bit of salt. Cook them for a couple of minutes, then add the leek & garlic and a bit more salt, if desired. Cook the whole mixture for a total of about 5 – 8 minutes, until the morels have shrunken noticeably and are very soft. Remove from heat and stir in the parsley while still hot.

Serve as a tapa by themselves. Nom nom nom … In the meantime, I will work on coming up with something a bit more substantial to serve as a main course or something.

*Pronounced More- ELL (contrary to what my pun might suggest)

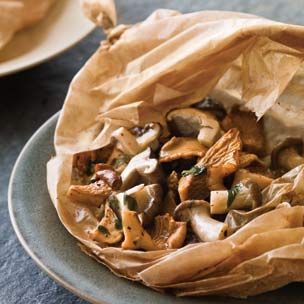
Wild Mushrooms en Papillote (Vegan or Vegetarian)

They're not your father's Freedom Fries

Photo property of Williams-Sonoma

You might have noticed a recurring theme. I’m way batty for mushrooms.

This time I decided to break away from my normal preferred mushroom cooking method and try something different. It’s a slight adaptation of a gem from my home skillet Billy S and certainly an easy way to cook mushrooms if for some reason you find it impractical to saute them on the stove top. The only thing is that I’m not sure if there’s any real advantage to preparing your mushrooms en papillote, other than to sound French, impress Martha Stewart or delight your guests with mushrooms from a paper bag. Some say that this method is healthier because it cuts down on the amount of oil you cook with, but a) you’re replacing it with butter or margarine; and b) cooking mushrooms stove top doesn’t really call for all that much oil. So I don’t know what that’s about. One thing I can say is that cooking your mushrooms this way will result in slightly softer, less browned mushrooms, so if you’re trying to control texture and presentation, that could be a reason to choose the papillote method.

Three important departures from the Billy Sonoma version that I’ve included here: 1) Omitted the parsley because I was serving them in an arugula salad and didn’t need the extra bitterness; 2) After steaming them in the parchment for about 10 minutes, I opened up the bag to dry them out a bit, because they had produced quite a bit of moisture, as we all know our fungus friends are wont to do; 3) Added red pepper flakes, because you know I love the spicy, yo.

One last thing. If you’re wondering where you can get your hands on some parchment, you can find it in most grocery stores in the aisle with aluminum foil and wax paper.

Wild Mushrooms en Papillote

  • 1 tbsp vegan butter or unsalted butter, plus 1 tbsp vegan butter or unsalted butter, cut into small pieces
  • 1 lb mushrooms, brushed clean – I used shiitake, trumpet and almond mushroom (random farmer’s market find), but you could use any combination of mushrooms you like
  • 1/2 tsp ground sea salt
  • 1/4 tsp freshly ground pepper
  • Red pepper flakes, to taste
  • 1 tsp fresh lemon juice

Preheat an oven to 375°F.

Cut parchment paper into an 18-by-11-inch rectangle. Fold the rectangle in half crosswise. Open the parchment and coat with the 1 tbsp butter. Place the rectangle, buttered side up, on a baking sheet.

Cut the mushrooms into bite-size pieces and place in a bowl. Add the salt, pepper, butter pieces, lemon juice and toss well. Spread the mushrooms over one half of the prepared parchment paper. Fold the other half of the parchment rectangle over the mushrooms and fold the vertical edges over twice, working your way along the edge of the paper to end with a twist on both ends. Place the package on a rimmed baking sheet.

Bake until the parchment packet is puffed and the mushrooms are cooked through, about 10 – 12 minutes. At that point, do a progress check – have they thoroughly juiced? If so, go ahead and carefully open up the parchment and return them to the oven for another 1 – 3 minutes to dry out any lingering liquids. Transfer the parchment packet to a platter and serve immediately. (Or, if you’re making a salad, add them to the salad and serve immediately. More on the salad coming soon.)

Chik’n Marsala (Vegetarian)

Chik'n Marsala, Garlic Mashed Potatoes and Fiddlehead Ferns

Two presentations of Chik'n Marsala, Garlic Mashed Potatoes and Fiddlehead Ferns. Recommended wine pairing: Pinot Noir or Chardonnay

I guess I was feeling nostalgic for home on my dad’s birthday (4/08), because I was trying to decide on something new to cook for dinner and thought, “Hey, I should make vegetarian chicken marsala!” See, my dad used to make it all the time while I was growing up. But I don’t think it had occurred to me until just that moment how much I’ve always missed it.

So, I did some research on different recipes and came up with a general plan, then ran my ideas by my dad. He had some suggestions, and this recipe is the culmination of  it all. J and I really enjoyed it, but I will probably tweak the sauce a bit in the future, so stay tuned for updates. And by all means, if you try it yourself, please let me know what you think.

Oh yes, and one more thing. Apologies to my vegan compadres, but I used Quorn vegetarian chik’n filets in this one, which are made with egg products. Unfortunately Quorn is the only brand I am aware of that offers an actual unseasoned filet. (All the vegan varieties are either pre-seasoned or breaded. Sob.) And since its veganhood was already compromised, and since we just happened to randomly have butter in the house (long story), I went ahead and made it with butter too, though you could certainly skip the butter if you prefer. And if you find any unseasoned vegan chik’n filets out there in the world, please let me know.

Chik’n Marsala

  • 4 Quorn chik’n breasts
  • Enough flour to lightly coat the chik’n
  • 1 shallot, diced
  • 2 cloves garlic, minced
  • Fresh ground sea salt and black pepper
  • 3 tbsp olive oil
  • 1 lb crimini mushrooms, sliced (My dad had suggested using shiitakes to stand in for the meat flavor of the chicken, which I agree would have been a good choice, but the shiitakes at the market were looking pretty sad, so I went with criminis this time. Either will suffice.)
  • 1/2 c. marsala wine
  • 1/2 c. vegetable stock (I used a mushroom-based stock.)
  • 2 tbsp butter (Optional, though I recommend it for a smoother, more balanced sauce. More on this below.*)
  • 1- 2 tbsp lemon juice

Mix up a bit of flour, salt and pepper in a bowl big enough to pseudo-bread the chik’n filets. Dip the filets in the flour to lightly coat them. Keep the flour nearby in case you need it to thicken up the sauce at the end.

In a large skillet on medium-high heat, heat the olive oil. Place the filets in the pan and fry about 5 minutes on each side, until they are golden brown. Remove from the skillet and place on a platter in your oven or microwave to keep them warm.

In the same pan on medium heat, add the mushrooms (heat a bit more oil first, if necessary). Toss in oil and saute for a minute or two, then cover until they juice, stirring occasionally per my standard mushroom protocol, about 3 – 5 minutes. Remove cover and continue to cook until the juice is reabsorbed. Season with salt and pepper to taste, being mindful that the soup stock may have additional salt.

Add shallot and garlic and saute just a bit longer, until the shallot is slightly softened. Add the marsala and lemon juice and cook for about a minute to reduce. Add soup stock and simmer for a couple minutes more to further reduce.

This is when you should add the butter, if you so choose. Personally I had been on the fence about the butter up until this point, but the sauce was not as thick as I wanted it to be, so I went ahead and used it. The addition of the butter made the sauce much richer and smoother, and also had the effect of bringing the flavors of the wine and mushrooms into better balance. It would have been fine without it, but for those of you who don’t mind butter, I’d recommend it.

If, after all this, the sauce is not quite as thick as you’d like, stir in a bit of flour (I used about a teaspoon) to reach desired consistency (I know, using flour is cheating, but whatever. Life is too short to wait around for every single sauce to reduce). Return the chik’n filets to the pan and simmer gently to reheat. Voila, dinner ees serfed.

Note that I decided to serve this dish with garlic mashed potatoes (recipe coming soon) and fiddlehead ferns. But any combination of starch and green vegetable would be excellent companions. Try rice and broccoli. Try pilaf and asparagus. Try orzo and green beans. Or any combination thereof. Or try something else entirely, you are certainly not limited to starch and greens. Whatever floats your boat, my friends, I’m sure will be divine.

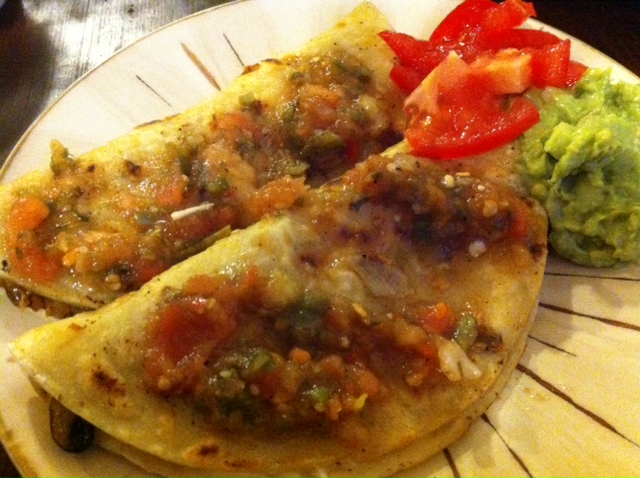
Mushroom Quesadillas (Vegetarian)

Hongos y queso, que guay

Mushroom quesadillas topped with salsa, tomato and guacamole

Oh, I stole this from Rick Bayless, Mexican food chef extraordinaire. Though I suppose I didn’t really steal it, since I paid for his book and all. And I haven’t changed anything about it, so perhaps this is plagiaraism, but … well, I’m here to just help you find good vegetarian recipes that you can trust, so I don’t worry about semantics like that. Rick Bayless, please don’t hate me for sharing:

  • 1 lb mushrooms (preferably button, baby bella, shitaake or some flavorful variety – though white will also do), sliced in ~ 1/4 inch slices
  • Smallish corn tortillas
  • Olive oil
  • 2 – 3 serrano peppers, de-seeded and minced
  • 1/4 c. chopped cilantro
  • 1/4 – 1/2 tsp salt
  • 1/2 c. grated Monterey Jack cheese

So, get all the ingredients to the state they’re supposed to be. In a large skillet, heat about 2 tbsp oil on medium heat and add the mushrooms and pepper. Toss in oil and cook lightly for a minute or so. Cover and cook for 4 -5 minutes, stirring every minute or so, until the mushrooms let out a lot of juice. Once they’ve juiced, remove cover and continue to simmer briskly until most of the juice has evaporated, another 2 minutes or so. Add the salt and cilantro at this stage, continuing to stir and cook until the cilantro is wilted, and tasting to determine appropriate amounts.

When you’re satisfied with the mushrooms, remove from heat and set aside.

Preheat your oven on the lowest possible setting with a casserole dish or baking sheet inside – when quesadillas are done, you can place them inside to keep them warm while you are waiting to cook them all before serving.

Meanwhile, heat a skillet on medium-high. With a basting brush or something to that effect, cover one side of a tortilla with olive oil. Place the tortilla, oil side down, in the middle of the pan. Sprinkle a small amount of grated cheese on the tortilla, leaving approximately 1/2 inch border. Spoon about 1 – 2 tsp mushroom mix into the middle of the tortilla and cook until cheese is melted. Fold tortilla over and cook on each side, flipping over every minute or so until crispy on both sides.

When each quesadilla is done, scoop it out with a spatula and move to the heated dish or baking sheet in the oven to keep warm until ready to serve.

Serve with salsa and guacamole and/or whatever you like.

Cooking Mushrooms

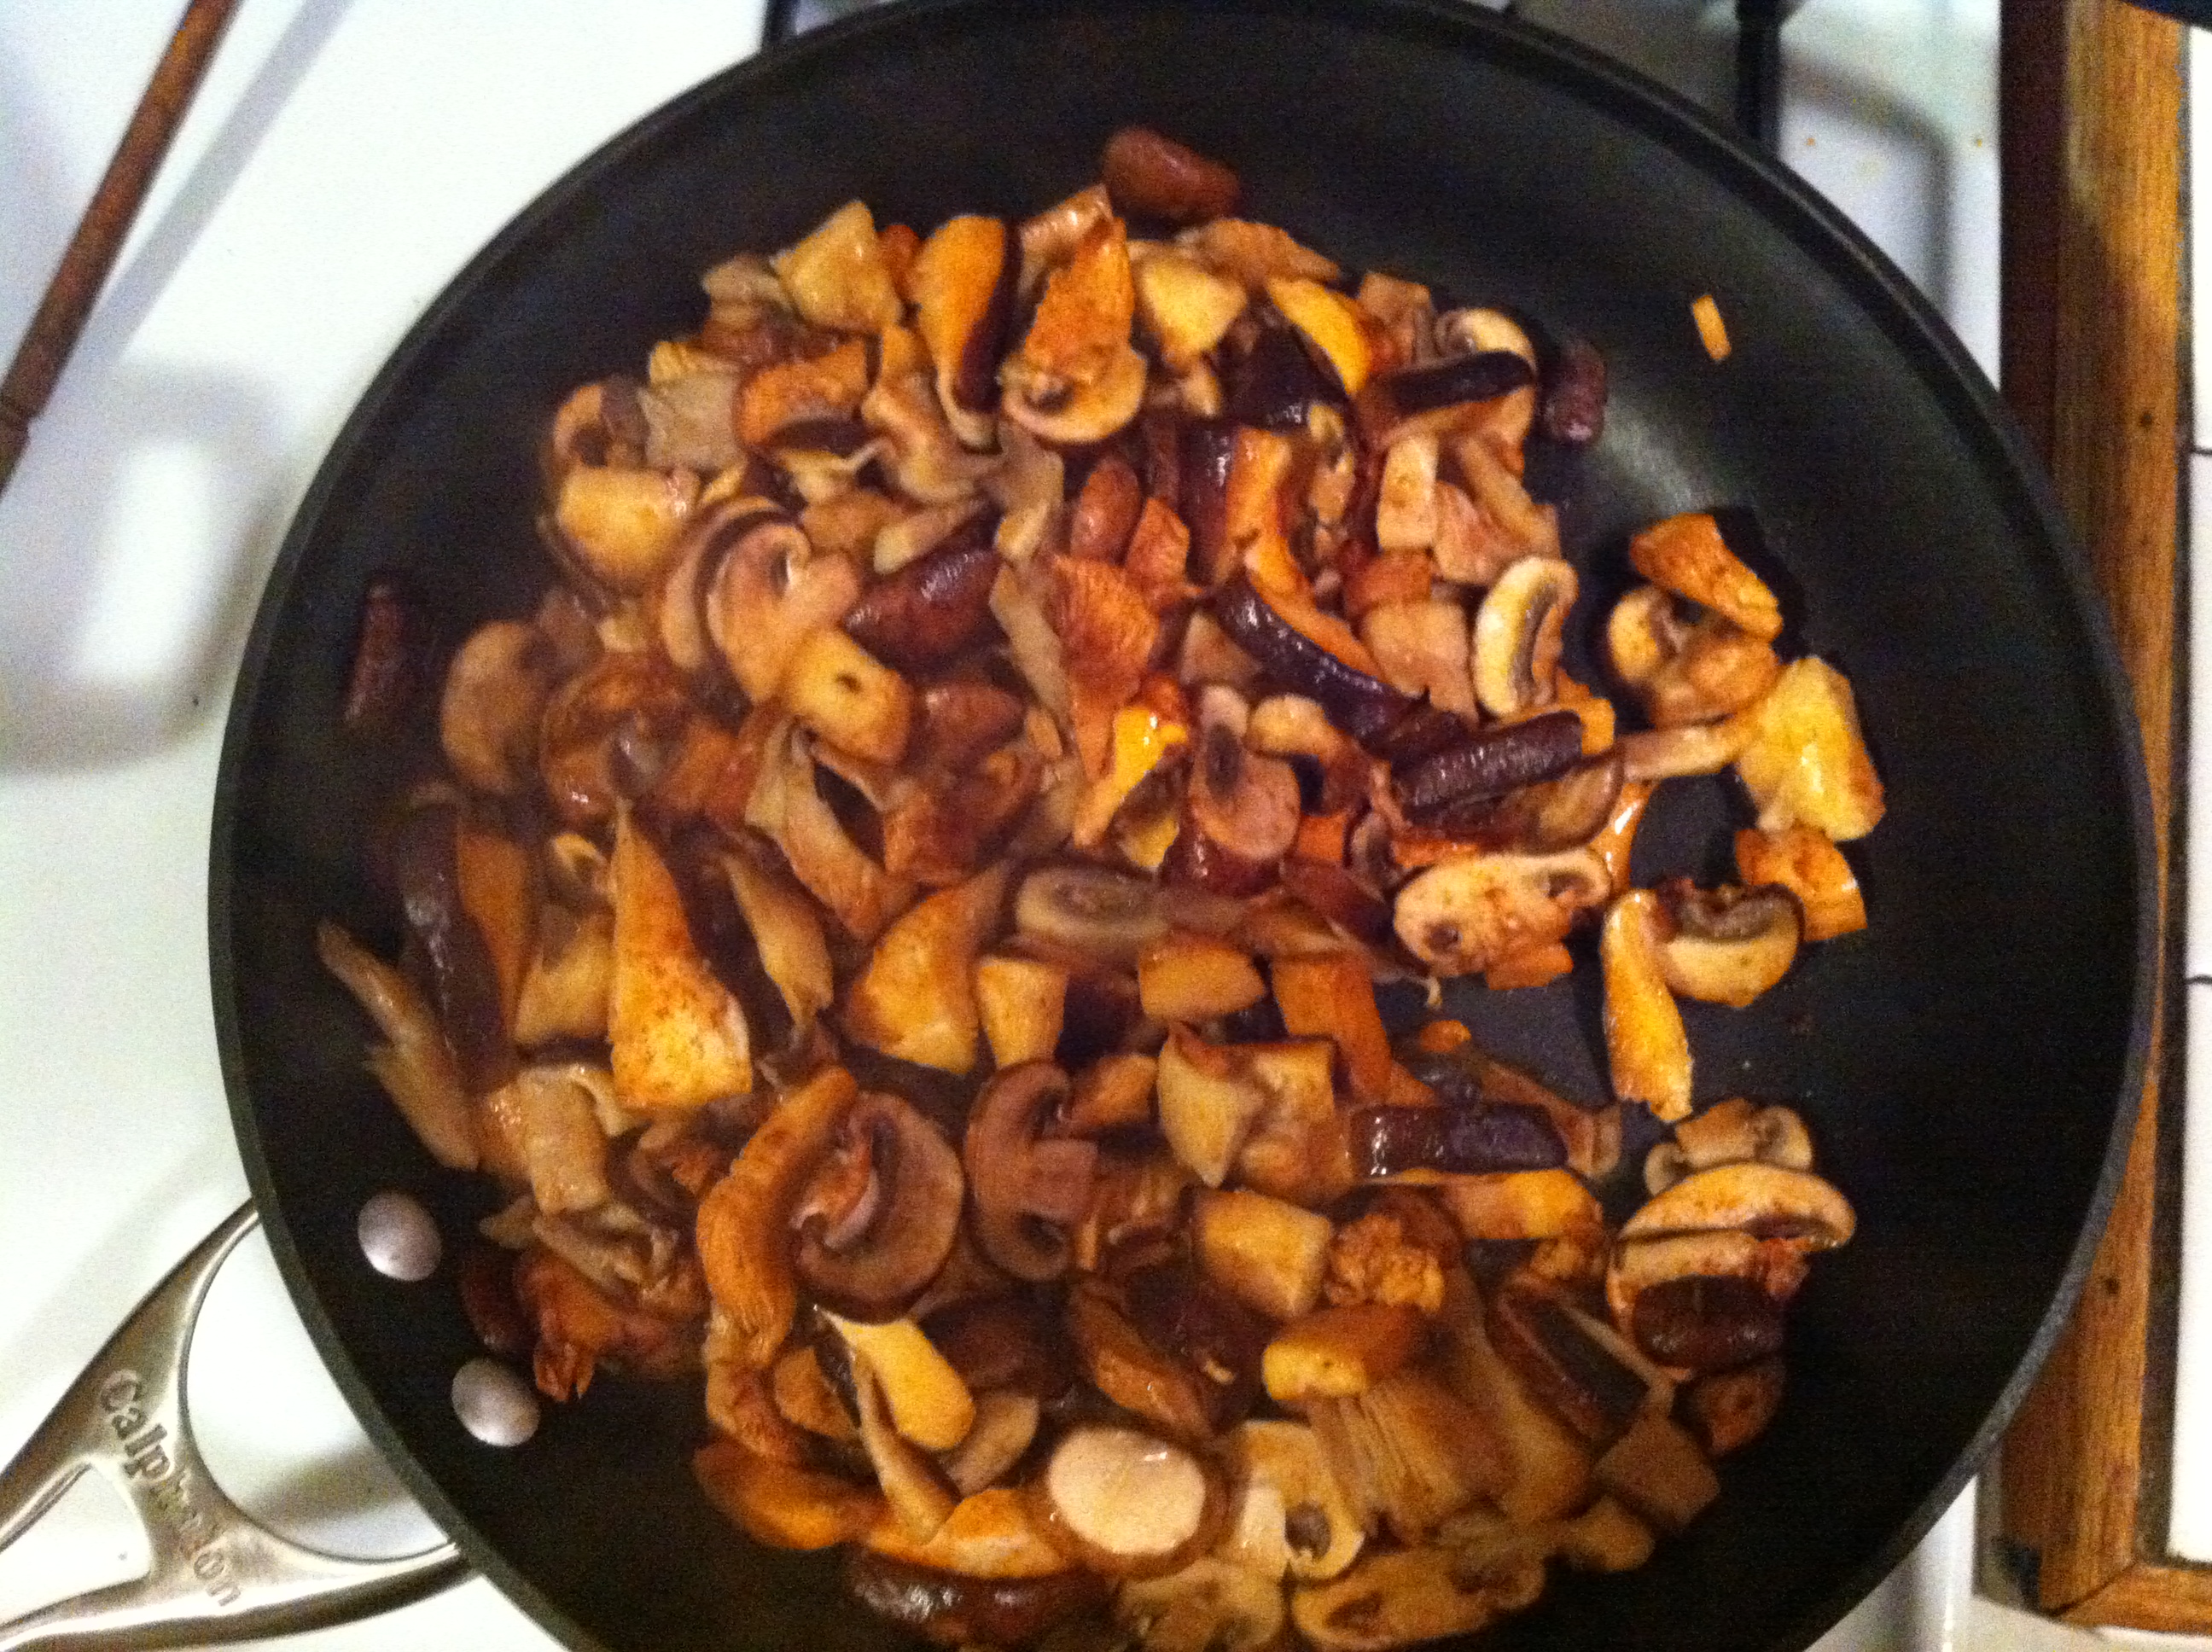
First of all, you should be aware that I am no mushroom expert. Everything I know about cooking mushrooms I have learned in pursuit of trying not to be such a miserable failure at cooking mushrooms. The fact is, for years I was totally incapable of ever doing anything with mushrooms except destroying them. And then one day I thought to myself, “I love mushrooms so much, it’s tragic that I couldn’t cook a single mushroom well, even if my life depended on it. I wonder if I can find any information online on how to cook mushrooms …” And then of course I immediately found tons of information and I realized I had been a fool to spend so much time ruining mushrooms when there was a huge body of wisdom on the subject right at my fingertips the whole time. In sum, I read some articles and now I’m much better at cooking mushrooms. Contrary to what I previously believed, it’s not rocket science. One just needs to be aware of a few key mushroom properties. For instance, cooking delicious mushrooms starts with storing & preparing them properly.

Storage and prep

  • Select mushrooms that are spongy but not soggy, avoiding the ones with damaged gills.
  • Keep them in paper bags, not plastic, so they don’t get slimy. (Mushrooms have a lot of moisture and paper will absorb it and keep them dry longer.)
  • Don’t wait too long to prepare them; old mushrooms start to taste kind of nutty (not in a good way). I find that the mushrooms I buy from the store are usually past their prime after 3 – 4 days.
  • Depending on what you’re doing with them, it’s probably a better idea to brush them clean rather than rinse them. Use a soft, dry cloth, or, better, a mushroom brush (if you can’t find a mushroom brush, use another soft brush; for instance, I use a basting brush). If you rinse them, they can get slimy, though for the most part if you are cooking them immediately after rinsing them it will probably be okay, it just may introduce more moisture into the recipe. I personally prefer to brush them, I think it’s more effective, and also it’s kind of fun and meditative.
  • Don’t slice them too thin; I learned this from my friend Nick who worked as a professional line cook for some years. Apparently if you slice them too thin they soak up too much oil and cook too quickly, resulting in limp and overcooked mushies. No thanks! I try to cut them no thinner than 1/4 inch thick.

Cooking the ‘shroooms

Mushrooms, as we’ve alluded to, are full of moisture, but they can also be very absorbent. So it is important to first allow mushrooms to release their juices before doing much with them, and it is also important to remember that after releasing their juices, they will immediately reabsorb them along with anything else in the pan. So, one ought to be judicious about when to introduce things like garlic or onion or salt during the sauteing of mushrooms. For example, let’s consider my Mushroom Spinach Arrabiata, in which we begin with the mushrooms accordingly:

  • Saute the mushrooms on medium heat for a couple of minutes
  • Cover and continue to cook until they juice, a few minutes
  • Uncover and continue to cook until the juice is gone again, a couple more minutes

Then add the onion and garlic. And later salt.

If we were to add the onion and garlic at any stage prior to the re-absorption of the juices, then the flavor of the mushrooms could be overwhelmed by the flavors of the additional ingredients. I’m not saying there will never be situations where you wouldn’t want that to be the case; for instance, the chanterelles and fresh corn recipe calls for everything to sauté simultaneously, and the chanterelles are strong enough that the sweetness of the corn is simply a compliment. In any case, it’s just something to be conscious about.

There are other schools of thought that suggest that you can just quickly brown mushrooms for a couple of minutes and throw them right into the other ingredients of your recipe when they’re slightly toasted. In theory I suppose this could work, but in practice, I have never found it to produce results that I’m happy with. On the occasions when I’ve browned mushrooms and not let them juice before proceeding, I’ve felt the mushrooms ended up tasting kind of raw and tinny. Maybe some people like that, but I prefer the post-juiced mushrooms because I think they have a more voluptuous flavor that way.

So, yes. That’s my 62 cents on cooking mushrooms.mmmmmm

Mushroom Spinach Arrabiata (Vegan)

This is a very fast and easy pasta of the variety that I usually make if I haven’t been to the store for a while and/or I’m feeling lazy. That is because I pretty much always have all of the ingredients on hand,* and also because it’s really fast and easy to make. Oh wait, I already said that. Did I mention it’s fast and easy? But how about quick and simple? Anyway. As an aside, if I were dispensing unsolicited advice on general kitchen-keeping, I’d say try to usually have these ingredients on hand. With these basics, there are many different dishes which can easily be thrown together on a moment’s notice.


Mushroom Spinach Arrabiata

  • 1/2 lb mushrooms (I like button or baby bella, but any kind will do)
  • 4 tomatoes, roughly chopped
  • 6 c. uncooked spinach
  • 1/2 onion, diced
  • 2 – 3 cloves garlic, minced
  • 2 tbsp olive oil
  • 1 can stewed tomatoes, chopped, with sauce
  • Oregano (or you could just use a generic Italian seasoning blend – Trader Joe’s has a pretty good version)
  • Red pepper flakes, to taste (I use a lot)
  • Salt & pepper to taste
  • 1/2 package of pasta (follow cooking directions)

Saute mushrooms on medium heat for a couple minutes, then covered for a few minutes more until they juice. Remove cover and continue to cook until liquid is reabsorbed. Add garlic and onion and saute until onion is softened.** Add tomatoes and spinach and cook until spinach is fully wilted and tomatoes are mushy. Add stewed tomatoes and seasonings to taste. Continue to cook until the sauce is thick and pasta is done.

Serve immediately with pasta. Makes  approximately 4 servings.

*You can omit any of the fresh vegetables if you don’t have them.

**J prefers this sauce to be pureed with the onions and fresh tomatoes for a smoother sauce. If that is your preference too, then simply start by sauteing the onions & garlic before the mushrooms, add the tomatoes and tomato sauce, then blend in a food processor until smooth. Saute the mushrooms separately per my directions above, add the spinach and saute until it wilts, then add the pureed sauce to the mixture and cook until it’s hot.

Mushroom Stroganoff (Vegan)

Mmmmm is for mushrooms

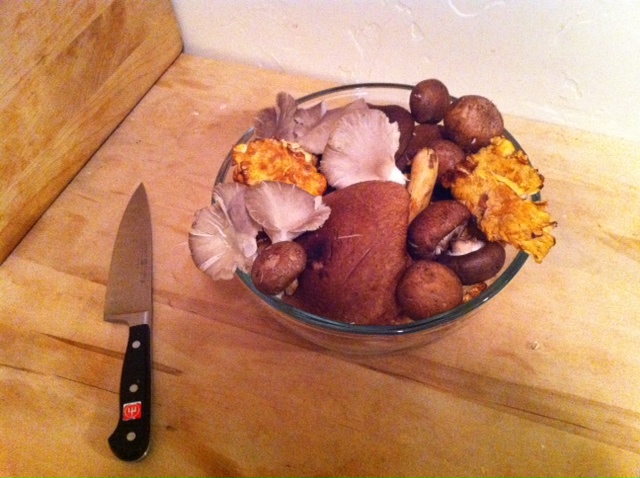
Oysters, shitaakes, chanterelles, baby bellas


Mmmmmmmm is for mushrooms. That’s right.

So, once upon a time before I became vegetarian, I happened to discover an outrageously amazing Beef Stroganoff (in a restaurant in Lawrence, KS that is no longer open). After I quit eating meat, I always lamented that Beef Stroganoff and thought to myself that if there was one thing I missed about a non-veggie lifestyle, it was that magically delicious Stroganoff. In fact, it was that Stroganoff that first kindled my love of mushrooms, a passion which has grown to implausible proportions since. Lo, you can imagine my delight when I finally perfected (in my opinion) my own vegan version of that Stroganoff. Which isn’t really my own version, rather it’s a slight variation on Cully’s recipe from Child of Atom. The main differences are that I prefer to cook the mushrooms in a slightly different way than he recommends, the sour cream is vegan, I eschew the mustard and add parsley.

I do believe that beef lovers themselves would look favorably upon this rendition. That said, I offer it freely to you in all its vegan glory. (Note: If you’re jonesing for some dairy, you can make it non-vegan with real sour cream.)

Mushroom stroganoff

  • 1 1/2 lbs mushrooms, sliced (a mix of different kinds is good, but baby bellas alone will do quite fine)
  • 1/4 cup chopped parsley
  • 2 shallots, finely chopped
  • One large clove garlic, minced
  • Fresh ground sea salt and pepper, to taste
  • 1 1/2 cups Tofutti non-dairy sour cream
  • 1 cup vegetable stock
  • A few splashes of dry white wine and white wine vinegar (ratio of 1 part vinegar to 3 parts wine)
  • Paprika to taste (though, as J points out, if you can taste it, you’ve probably put in too much)
  • 3 tbsp olive oil
  • Your favorite type of pasta (though I do recommend the short types of noodles, like rotelle or penne or the like)

Cook your pasta of choice per its standard instructions. Meanwhile …

In a large skillet over medium heat, heat the olive oil and add the mushrooms. Toss until coated in oil and continue to stir regularly for a couple of minutes. After a couple of minutes, cover and continue to cook, stirring occasionally, until they juice – usually 2 to 5 minutes. After the mushrooms have juiced, remove the cover and continue to cook until the juice is reduced. Remove from heat and set aside.

Next, saute the shallots and garlic until the onions soften. Add the wine – not too much, but maybe just enough to cover the bottom of the pan and a few splashes of vinegar, and bring to a boil. Once boiling, add the sour cream and return to a boil. Cook for a few minutes until liquid is reduced. Add veggie stock and return to a boil. Same drill – cook for a while until the liquid is reduced. Stir in the mushrooms and parsley, salt and pepper to taste, and serve.

Crazy delicious

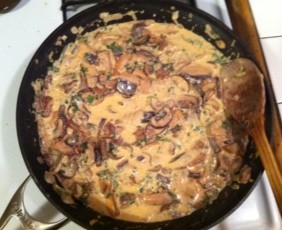
Stroganoff awaiting its pasta

Chanterelles & Fresh Corn (Vegan or Vegetarian)

tasty

Not my own pic, but close enough

Totally ganked this recipe from the LA Times. But no specific chef or author was credited, so my props can’t go further than that. The addition of the gruyère was my own innovation, albeit a modest one. Also, if you use the gruyère, obviously it’s not vegan anymore, and furthermore it wouldn’t technically be vegetarian either, because gruyère usually contains rennet. But, since gruyère is so delicious, it’s one of those occasional rule benders we’re known to eat. Whatever—this dish is rich and luscious with or without the gruyère. Also, it’s super fast & simple to make.

  • ~4 – 8 oz chanterelles
  • ~4 cobs fresh sweet corn
  • 2 tbsp walnut oil (if you don’t have walnut oil, olive oil will suffice)
  • ~ 1 tsp sea salt
  • Bit o’ water or homemade veggie stock (extra credit for mushroom stock, if the latter, however, be mindful that whatever stock you use isn’t too strong, as this dish has subtle flavors that could be overpowered by too bold of a stock)
  • ~1/3 cup shredded gruyère, if desired

Dust the chanterelles clean with a mushroom brush and slice them in whatever way makes most sense to you, but not too big, small or thin.

Cut the corn from the cobs – it’s not difficult but it does take some getting used to. Here’s what I do: Remove the husks & cornsilk. Take the cob, stand it on its flat end in a dish deep enough to prevent the corn kernels from flying all over the place. Take a sharp knife and slice in four sweeps, 3 or 4 or so rows of kernels at a time, creating a cube around the cob. Does that make sense? If not, please view this tutorial for a visual representation.

Heat the oil. Throw the mushrooms, corn & salt into the pan, stir and saute for about 2 minutes. Add the veggie stock (or water) and cover, stirring occasionally. Let cook around 8 minutes, until corn is tender. Uncover the pan and continue to cook until liquid is mostly evaporated. Salt & pepper to taste, and serve with shredded gruyere (if desired).